I am a major peanut butter groupie. I can spoon it out of the jar and eat it right then and there, No nothin’ needed. Just me, a jar and a spoon. So, of course I love peanut butter cookies and there’s just a little something special about topping it off with some chocolate. Now these get a little fussy and fancy.
If you don’t have the time or inclination to make the homemade chocolate centers, just plop a chocolate kiss in the center of each cookie as they come out of the oven and be done. That’s what is featured in the photo because sometimes you just want to make it simple!
Peanut Butter Blossoms
An old favorite made special with a homemade chocolate center
Ingredients:
½ cup shortening
½ cup creamy peanut butter
½ cup brown sugar
½ cup granulated sugar
1 egg
1/8 cup milk
1 tsp. vanilla
1 ¾ cup gluten free flour
¼ tsp. xanthan gum ( if your flour blend does not have it already)
1 tsp. baking soda
½ tsp. salt
¼ cup granulated sugar for rolling the dough in
For the chocolate centers:
¼ cup butter, softened
¼ tsp. vanilla
1 ¼ cups powdered sugar
¼ cup unsweetened cocoa powder
1 Tbsp. milk
1 Tbsp. agave syrup or light corn syrup
Piping bag with a star tip attached
Or: 36 chocolate kisses instead of the chocolate centers recipe
Directions:
*Needs to chill for 2 hours
In the bowl of a stand mixer ( or a large bowl with a hand mixer) cream together the shortening, peanut butter, brown sugar and granulated sugar until smooth. Beat in the egg until combined. Then mix in the milk and vanilla.
In a medium sized bowl, whisk together the flour, xanthan gum(if using), baking soda and salt. Turn the mixer on low speed and slowly add the flour blend. Mix until well blended.
Cover the bowl with plastic wrap and refrigerate for 2 hours.
Preheat the oven to 375 degree. Cover two baking sheets with parchment paper and set aside. Place about ¼ cup of sugar in a shallow container.
Take the cookie dough out of the refrigerator. Use a small cookie scoop or a tablespoon and roll the dough into balls. Drop into the sugar and roll to coat. Then place on the baking sheets with about 2” space between.
Bake for 12 to 14 minutes or until pale golden brown. Take out of the oven and allow use a spoon to make an indent into the center of each cookie. Cool for 3 minutes on the sheet. Then transfer to a wire rack and cool completely.
( If using the chocolate kisses, make sure to press them in now instead of making an indent with a spoon. They will warm a little and melt some. Yummo!)
Make the chocolate filling.
Beat the butter and vanilla together. Then slowly mix in the powdered sugar and cocoa powder. Beat in the milk and syrup.
On high speed, beat the mixture until smooth and fluffy. Transfer the chocolate filling into a piping bag and pipe stars into the center of each cookie.
Allow to set up before serving.
Makes about 3 dozen cookies.
Kathy
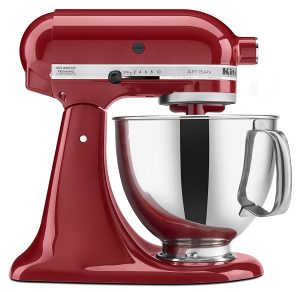
This is one of the best stand mixers ever. I’ve had mine for over 25 years and it’s just starting to think about giving me trouble. I may need a new one soon. But that’s a pretty good run for an appliance. I had to replace my refrigerator already! And I love the color. Pick one up on Amazon.
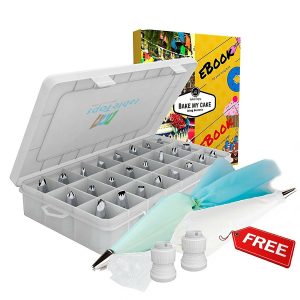
 If your decorating skills need some help, this decorating bag and tips is a bargain! Get yours today.
 Thanks so much! If you click on any of these links, I will receive a small commission.


2 Comments
Mary Jo
December 21, 2017Thank you for sharing this. I tried making these for a friend with serious gluten allergies and they were crumbly. I didn’t have the xanthan gum. Thank you so much
Kathy
December 21, 2017You’re welcome. They’re such a great cookie, and pretty simple to make. I’m sure your friend greatly appreciates your love and caring. I know I would!
Leave A Response